
Easythreed X1 3D Printer
At the beginning of this year I had seen videos on YouTube from some 3D Printing content creators that were testing/reviewing the Easythreed X1.
Here are links to some of the reviews;
- 3DMN - The Cheapest 3D Printer Yet - EasyThreed X1
- PRESS RESET - A $95 3d Printer!?! - EasyThreeD X1
Overall they were impressed what this cheap(-ish) little printer could do. And since I have no self-control when it comes to anything slightly techie or weird I ordered the Easythreed X1 from Banggood.
I seem to be developing a pattern here, ordering 3D printers while I am on holidays.
Repairs
Extruder stepper motor
I believe that my printer had an issue right out of the factory. After only a couple of prints (which were coming out extremely rough) the extruder stepper motor started skipping, even when the filament had not reached the nozzle yet. The filament could not get past the extruder gear. After contacting Easythreed I was able to order a replacement extruder motor from their store on AliExpress.
After replacing the bad one with the replacement unit the printer is back up and printing. The prints are now looking very good.
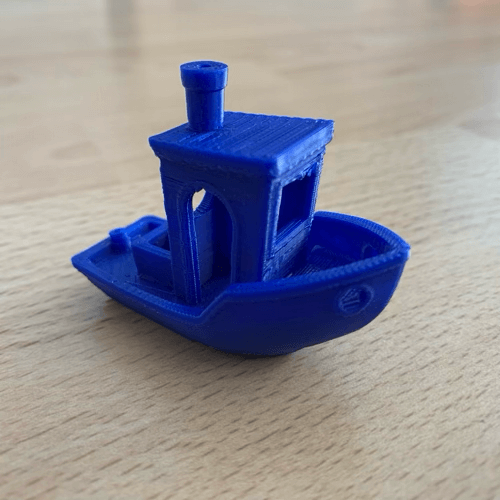 3D Benchy
Swapping X/Y
When printing all models came out mirrored. So you will either have to mirror the object in your slicing software (easy to forget) or swap some cables around in the control-box (set-and-forget).
I recently joined the Facebook-group ‘LABISTS 3D Printer Support’ where someone posted a link to a video with instructions on how to resolve the mirroring issue.
It will just take a couple of minutes and you are done.
Modifications
Power switch
Since the only way to power off the printer is by pulling the plug from the wall socket or unplugging the DC-plug from the printer itself I decided to insert a 5.5/2.1 DC-plug with switch (like the ones commonly used with LED strips) in between the control-box and the power plug. This makes it more convenient and might as well safe the cables and plugs from wear and tear.
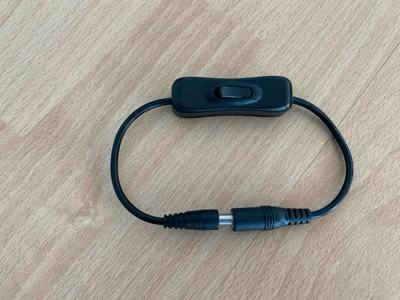 5.5/2.1 DC-plug with switch
Part cooling fan
I order a part cooling fan together when I was ordering the replacement extruder stepper motor on AliExpress. The description of the fan also linked to a gcode file for the cover on Easythreed’s website. The gcode file is sliced specifically for the X1 printer, but I found an STL on Thingiverse which allowed me to slice and orient it for printing on my CR-20 Pro.
Depending on how secure you want the fan and cover to be mounted, you will need between 4 and 7 screws.
And since there is a video for everything, here is one showing the installation process of the part cooling fan.
Risers
To be able to put the control-box underneath the 3D printer I designed risers in Fusion 360. These risers have a tight fit and snap onto the frame of the Easythreed X1. Just need to print four of these. I also put recesses (13 mm diameter, 1 mm deep) in the bottom of the riser which allows for two (self-adhesive) rubber feet to be placed. This should help dampen vibrations from the printing process as well as prevent the printer from sliding around your desk.
 Easytheed X1 riser
You can find the model on Thingiverse
Spoolholder
Since I have installed the risers, I could not make use of the provided spool holder any more. Back to Fusion 360 to design my own custom spool holder.
 Easytheed X1 spool holder
You can find the model on Thingiverse
Ultimaker Cura (4.4.1)
I didn’t like the slicing software that came with the printer, Easyware (besides being a bit limited, it also causes my CPU’s to ramp up resulting in a lot of fan noise) and I am already familiar with Ultimaker Cura that I am using with my other 3D printer, so after reviewing the settings that are used in Easyware I put together a new printer configuration and a printing profile (mix between Standard and Optimize).
So far the configuration is working fine, the only thing is that rafts are hard (and sometimes impossible) to remove. Most of the times I am printing just with a skirt or brim anyway, so not a big issue for now. I am however applying a fresh layer of glue stick to the build plate for each print.
Machine settings
| Printer | Settings |
|---|---|
| X (Width) | 100 |
| Y (Width) | 100 |
| Z (Height) | 100 |
| Build plate shape | Rectangular |
| Origin at center | Not checked |
| Heated bed | Not checked |
| Heated build volume | Not checked |
| G-code flavor | Marlin |
Also tested with G-code falvor set to ‘RepRap’, both seem to be working fine. But since the firmware reports Marlin (Marlin 1.1.0-RC3, yup ancient), I am sticking with Marlin for now.
| Printhead | Settings |
|---|---|
| X min | 0 |
| Y min | 0 |
| X max | 0 |
| Y max | 0 |
| Gantry Height | 100 |
| Number of Extruders | 1 |
Start G-code
;Print time: {print_time}
M104 S180
M109 S180
G21
G90
M82
M106 S0
G28 X0 Y0
G28 Z0
G92 Z0
G1 Z15.0 F900
G92 E0
G1 F200 E10; prime the nozzle
G92 E0
M117 Printing
End G-code
M140 S0
M104 S0
G91
G1 E-1 F300
G28 X0 Y0
M84
G90
Profile
Most important settings are the printing speed (50 mm/s for PLA and 20 mm/s for TPU), retraction speed (50 mm/s), retraction distance (4 mm for TPU retraction should be turned off).
You can download the profiles for PLA and TPU using the links below;