
Toggle Network Services on Mac OS
From time to time when performing a number of large downloads simultaneously, for whatever reason the network connectivity for the Ethernet port stops working. Looking at the Network pane within System Preferences does not give any indication that there is an issue with the Ethernet port. 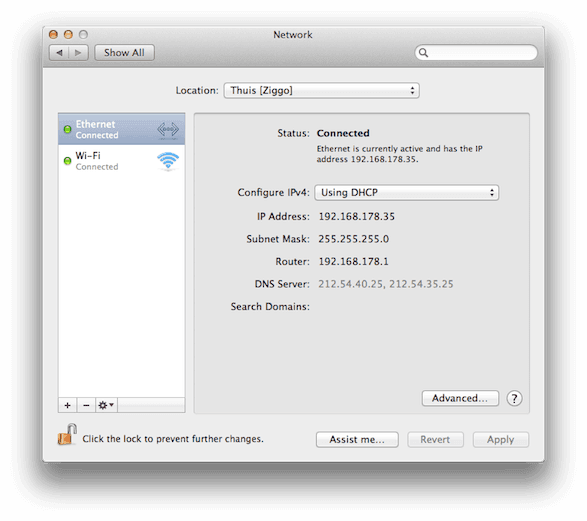
Resolving The Issue Manually
Resolving the issue manually requires the following steps
- Open System Preferences and goto Network
- Select the Ethernet service
- Click on
 and select the option ‘Make Service Inactive’
 - Click on the ‘Apply’ button
Now the Ethernet service has been deactivated, now perform the following steps to activate it again
- Click on again and now select the option ‘Make Service Active’
- Click on the ‘Apply’ button again
Now the Ethernet serice is active again and the connectivity issue is resolved. Not a lot steps but tedious nonetheless. So there has to be a better way of performing all these steps.
Resolving The Issue From The Terminal
Your Mac comes with a tool named networksetup which is a configuration tool for network settings in System Preferences. You need at least “admin” privileges to be able to run this tool. If you what to see all the things this tool can do for you read through the man-pages (man networksetup).
Using the following command will give you a list of all the network services defined on your Mac
networksetup -listallnetworkservices
which will give something like the following (depending on what types of services have been added on your Mac)
An asterisk (*) denotes that a network service is disabled. Bluetooth DUN Ethernet Wi-Fi
From the man-pages I found that there is also a setnetworkserviceenabled option which takes the following syntax
-setnetworkserviceenabled networkservice on | offSo issue the following command will disable the Ethernet port
sudo networksetup -setnetworkserviceenabled Ethernet offand this will enable the Ethernet port again
sudo networksetup -setnetworkserviceenabled Ethernet onYou can also execute the command without using the sudo command, you will then be asked to enter your password in the Confirmation dialog that will appear
 Password Dialog
While this is already better, there is still room for improvement…
Automator To The Rescue
To further automate these steps I used Automator to create a Service
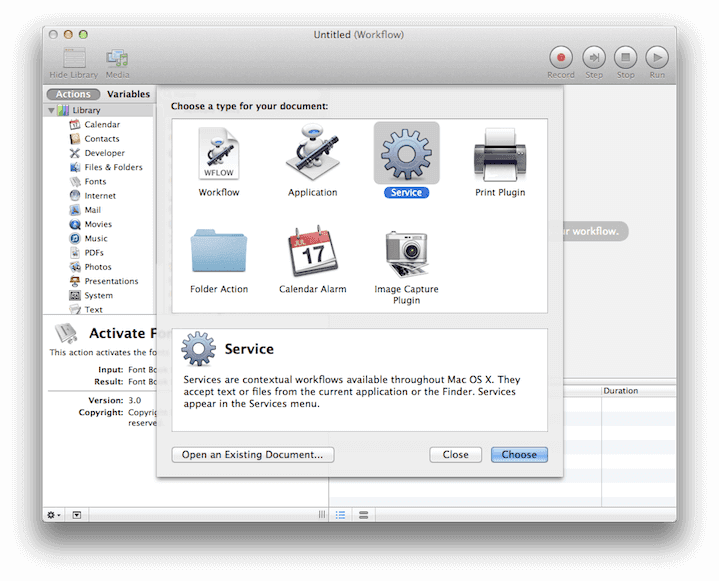
- Start Automator and choose ‘Service’ for the document type and click on the ‘Choose’ button
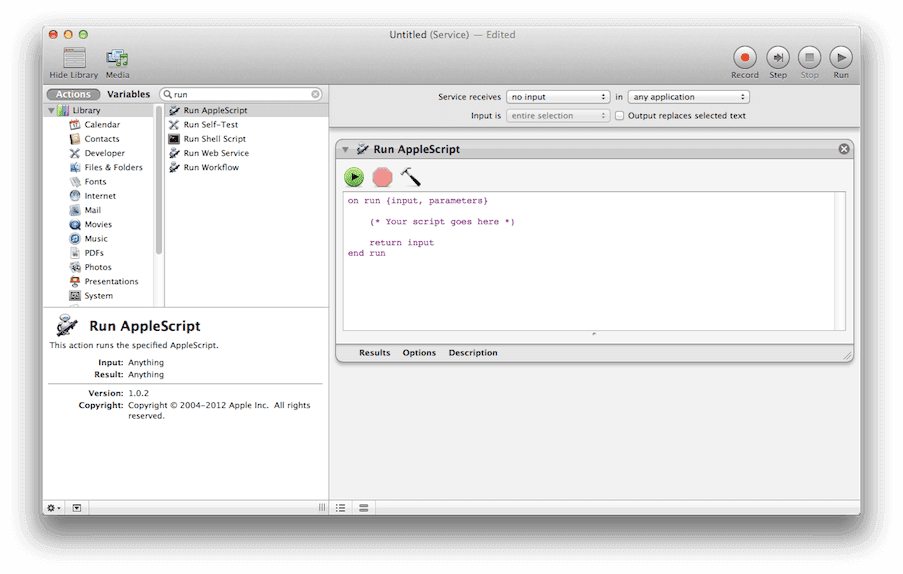
- Set ‘Service receives’ to ‘no input’ and select ‘any application’ for the second list
- Make sure
 is selected and type ‘run’ in the search box
 - Double click ‘Run AppleScript’ to add it as a step to the service
- Add the piece of AppleScript code (listed at the end of this post) into the AppleScript step (make sure to replace
<your account>and<your password>with the correct information)
- Save the Service and give it an appropriate name (I choose ‘Fix Ethernet’)
NOTE: Since your account name and password will be stored in the service this poses a security risk. By default a Service you create is stored in ~/Library/Services/ so the risks should be minimal as long as you exercise proper security steps (i.e. lock your Mac when you leave your Mac unattended).
From the moment the Service has been saved it will appear in every Services sub menu 
If you leave the System Preferences Network Pane open when you use the service you can even see the Ethernet service switch states.
AppleScript code
do shell script "networksetup -setnetworkserviceenabled Ethernet off" user name "<your account>" password "<your password>" with administrator privileges
do shell script "networksetup -setnetworkserviceenabled Ethernet on" user name "<your account>" password "<your password>" with administrator privileges