
Hubsan X4 v2 Camera mod
I recently bought a Hubsan X4 quad-copter and after some flying and crashes (already had to replace one of the rotors, blades and solder the power leads) I thought it would be nice to attach a camera to it.
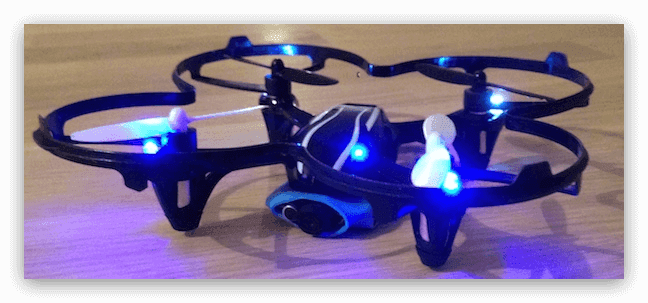
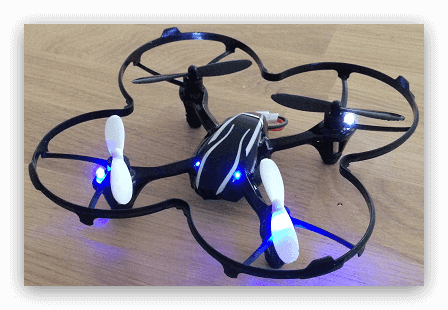 Hubsan X4 v2
Searching the internet on the subject learned that I am not the first one that had the same idea. Based on the information found it became clear that the Hubsan is not a heavy lifter, not a big surprise considering the size of the quad-copter. In almost every post or video I found on the subject, an 808 key fob camera was used.
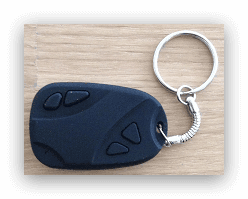 808 key fob camera
The 808 key fob camera
There are multiple version of this type of camera. I bought one on eBay and to be honest I have no clue which version it is, or how to determine the actual version of the camera. After opening the camera I noticed that although the casing has a reset pinhole, there is no actual reset switch behind it?! That’s what happens when you go ultra cheap I guess, but for now this doesn’t matter. After doing a bit of research I discovered that I bought an 808 #9. If I break it while modifying, better to break a cheap(ish) one… If I get it right I can always do it again with a better and more expensive version of the camera.
As soon as the camera had arrived I removed the key chain and taped it to the Hubsan. Even when applying full throttle the Hubsan was barely able to take off. The complete camera (excluding the key chain) has a weight of 14.3 grams, which breaks down as follows
| Item | Weight |
|---|---|
| Casing (screws and all) | 5.19g |
| LiPo battery | 4.17g |
| PCB + camera module | 4.95g |
The LiPo battery is the same as the one that powers the quad-copter itself, a 1S 3.7V 240mAh. So by sacrificing a little bit of flying time we can power the quad-copter and camera from one single LiPo battery.
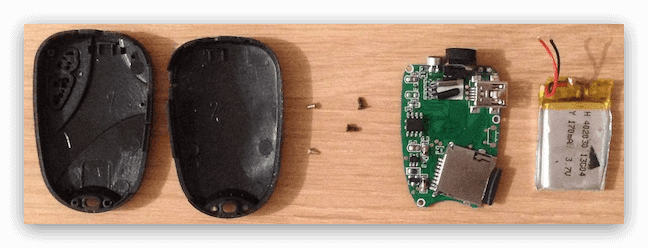 The disassembled 808 camera
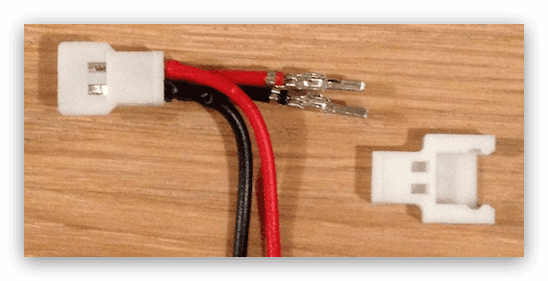
For this project I ordered some Losi Micro 2-pin Male-Female connector wires through eBay.
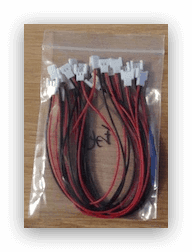 Losi Connector Wires and Sugru
It was a pack of 10 connector wires but you will only need one, it was just cheaper to buy 10 than just one…
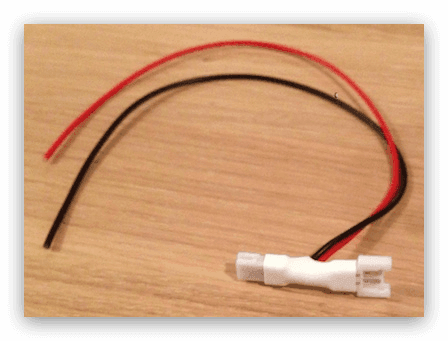
Power Cable
First step is to create a new power cable that allows a single LiPo battery to power both the camera module and the quad-copter.
By gently pushing on the metal insets you will be able to slide the wire (and leads) out of the enclosure. If you press too hard, they will no longer snap back in place. Cut the wires on one end about 1-2 centimetres from the leads and strip the wire endings. Solder the wires onto the leads, matching the colors.
Slide the leads back into their enclosures and apply some (hot) glue if the leads don’t snap into place.
 Leads in enclosure on one end
To further protect the new connectors you could place some heat-shrink tube around to firmly keep them together. The circumference for the small parts of the connectors is about 1.6 centimetres, while the largest is approximately 2 centimetres. You should pick tubing that shrinks down to something a little smaller than 1.6 centimetres to ensure a tight fit. I picked a type that shrinks down to 50% (2:1) of its initial diameter to make it easier to slide over the wire and the connectors. Good thing to remember when ordering heat-shrink tubing is that sizes are usually noted based on diameter, so make sure to calculate it correctly ( ∅ = C / π ).
 Heat-shrink tubing applied
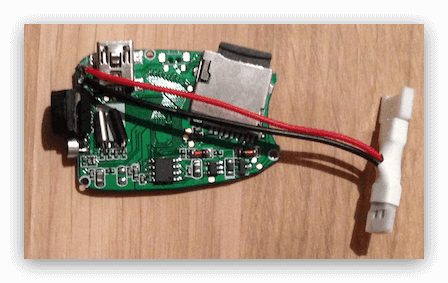
Cut the long wires down to size so connectors stick about 1 centimetre outside of the PCB, strip the wire ends and solder the wires onto the PCB. When you have a look at the pictures on this page you will notice that I have reversed the position of the red and black wires. Initially I wired them the other way around, but that caused the circuit to short out (USB port was getting too hot to touch).
 Wires soldered to PCB
The weight for the PCB + new power cable is 5.97 grams, which is roughly one gram heavier than without the power cable.
Camera Housing and Mount
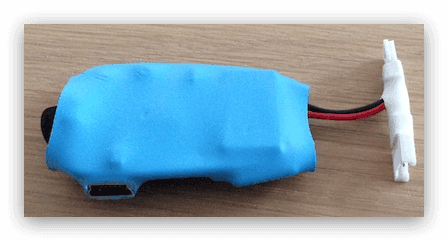
Next step is to create a housing/mount for the camera module. To provide some protection to the PCB I used another (larger) piece of heat-shrink tubing with some pieces cut out to provide access to the switches, USB port and micro SD card slot. Final weight is now 8.34 grams, still a bit on the heavy side.
 Protecting the PCB
By carefully cutting down the heat-shrink tubing at the end I was able to get the weight down to 8.14 grams, which is a bit on the heavy side.
To avoid adding too much additional weight I used a little piece of tesa Powerstrip to fix the camera to the body of the quad-copter.
 Hubsan X4 V2 and mounted camera
Field Test / Conclusions
Time to start flying the modified Hubsan X4…
The recording cuts out after approximately 34 seconds, probably the LiPo battery does not provide enough power to keep both the camera and the quad-copter running properly.
| 240 mAh LiPo | |
|---|---|
| Without camera | 6 min 48 sec |
| With camera | 3 min 15 sec |
In all it was a nice weekend project but adding the weight of approximately 8 grams to the Hubsan X4 is just too much for this little qaud-copter. With the extra weight added it responds very slowly to any command and has a hard time to even lift-off. Also flying the Hubsan in 8 kph wind is not the best flying condition either…
To improve the flying time I ordered a Beez2B 400mAh 1S 3.7V 25C LiPo accu from TopRC (will post an update when it has arrived). I also might put a little rubber band around the body and the camera, after a crash the tesa Powerstrip loses grip on the camera module.