
ZX Spectrum 48K (Issue 3B) with video issues (Part 2)
After my post ‘ZX Spectrum 48K (Issue 3B) with video issues (Part 1)’ I spent some time researching the issue and done some testing on the motherboard
- Schematics and layout for the Issue 3B Motherboard
- Found information on the ‘weird’ modification
- Measured voltages on the ULA, CPU, ROM and lower RAM chips
- Measured temperatures for the ULA, CPU, ROM, lower RAM chips (IC6-IC13) and upper RAM chips (IC15-IC22)
Schematics and layout for the Issue 3B Motherboard
To make it easier to track down components and follow the pathways between all of the components it is a good idea to have both a schematic and layout for the Issue 3B motherboard handy. ZX Spectrum PCB Schematics and Layout are available from Spectrum for Everyone
Higher resolutions versions are available at z00m’s speccy corner.
‘Weird’ modification
In the previous post I mentioned the ‘weird’ modification to the Issue 3B motherboard.
 Additional modifications to the motherboard
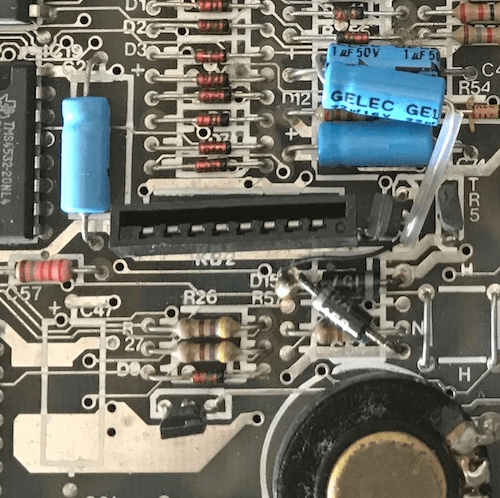
Apparently this motherboard has had a service modification based on the information noted for capacitors C47, C79 and C78 on the page Capacitor Lists (48K Range).
| Part | Capacitance | Note |
|---|---|---|
| C47 | 22uf 10v | Deleted per service mod on some units |
| C78 | 22uf 10v | Service modification, below R/H keyboard molex and D15/D17 |
| C79 | 1uf 50v | Service modification, in place of D16 |
Measuring voltages
In paragraph 3.1.2 (Voltage Check) of Sinclair ZX Spectrum Service Manual the following table is listed
| Circuit Reference | Nominal Value | Tolerance |
|---|---|---|
| IC6 Pin 9 | +5V | +/- 0.25V |
| IC6 Pin 1 | -5V | -5.5V to -4V |
| IC6 Pin 8 | +12V | +/- 1.2V |
| LT side of C52 | +12VA | +/- 1.2V |
On my Issue 3B motherboard I got the following values
| Circuit Reference | Measured Value |
|---|---|
| IC6 Pin 9 | +5V |
| IC6 Pin 1 | -5V |
| IC6 Pin 8 | +12V |
| LT side of C52 | +12VA |
Paragraph 1.11 (Power Supplies) mentions some additional points with expected voltages.
- TR4/TR5
- Voltage regulator (7805)
- D5/C44
- R62/C45
On the page ‘Repairing Spectrum & Spectrum Plus’ even more voltages are listed.
Measuring IC temperatures
After having been turned on for 30 minutes I measured the temperatures and again after 60 minutes to see if there are one or more chips that stand out. All temperatures list in the tables below are in degrees Celsius (°C)
Lower and upper RAM
| Lower RAM | 30 Min | 60 Min | Upper RAM | 30 Min | 60 Min | |
|---|---|---|---|---|---|---|
| IC 6 | 26,7 | 27,4 | IC 15 | 31,7 | 31,6 | |
| IC 7 | 26,5 | 27,3 | IC 16 | 32,4 | 32,1 | |
| IC 8 | 26,0 | 27,2 | IC 17 | 32,4 | 32,5 | |
| IC 9 | 26,0 | 27,3 | IC 18 | 31,5 | 31,9 | |
| IC 10 | 25,7 | 27,3 | IC 19 | 33,6 | 33,4 | |
| IC 11 | 25,7 | 27,1 | IC 20 | 34,4 | 34,7 | |
| IC 12 | 25,6 | 26,9 | IC 21 | 34,4 | 34,8 | |
| IC 13 | 25,6 | 26,9 | IC 22 | 34,2 | 34,7 |
Other IC’s
| IC | 30 Min | 60 Min |
|---|---|---|
| IC 1 (ULA) | 69,0 | 71,5 |
| IC 2 (CPU) | 45,4 | 44,4 |
| IC 5 (ROM) | 36,2 | 38,7 |
The reason for this test is information listed on the store page for Chips from Retroleum - The Retro Spares Shop. In the description for the 4116 RAM chips the following piece of text is included
Sometimes a bad chip can be detected simply by its temperature - if it is noticeably warmer than those around it, it will be highly suspect. Another crude but often effective test is to “piggy-back” a working chip on each RAM chip one at a time. If the error goes away or at least changes, there’s a good chance that chip is faulty.
I couldn’t find any information on what the ‘normal’ temperatures are expected to be, but besides the ULA (which is known to run hot) nothing jumps out. So for now I expect the RAM chips to be working, and I need to focus on the power issues first.
Difference in output between composite and ZX-HD
I have contacted Ben Versteeg (the proprietor of ByteDelight) about this issue and he gave me the following pointers
TR4 & TR5, and possibly one or more of the lower RAM chips. For each chip separately measure 12V to GND resistor (by temporarily cutting the 12V pin) and look if it measures low. Those chips will have to be removed (replaced). Only then replace TR4 and TR5.
So it appears with my own research I was pointing me in the same direction, there is hope for me yet
The YouTube video below is a recent one by Ben repairing an Issue 3B motherboard. Before continuing my efforts I will be spending some time viewing and trying to understand the steps he is performing. Throughout the video he is performing measurements on several components on and off board. Including the ones mentioned above (although without cutting IC legs since the IC’s are socketed).