
Shortcut (Workflow) to compress images using TinyPNG
To downsize the images used in my post I make use of the services provided by TinyPNG. Up to now I usually follow the following steps to make and prepare the images for a blog post
On iOS device:
- Take picture using my iPhone/iPad or find some artwork on the Internet (and save it the Photos library)
Using the Preview app on the Mac:
- Crop the image to the area of interest
- Scale the image to a certain width
- Convert the image to PNG
On the TinyPNG website:
- Upload it to TinyPNG
- Download the compressed image
Using the Finder app on the Mac
- Give the image a proper name
- Place the downloaded image within the
Public-folder used by Blot
A lot of steps of which most could be easily automated using a Shortcuts (formally Workflow). The only step I opted not to include in the Shortcut is taken a picture and cropping it, but even those could be part of it.
TinyPNG API
As part of the service provided by TinyPNG they also provide an API (free for up-to 500 images per month) which allows you to compress images right from the command line using curl.
Upload and compress image
curl https://api.tinify.com/shrink \
     --user api:YOUR_API_KEY \
     --data-binary @unoptimized.png \
     --dump-header /dev/stdout
the above command results in the image to be uploaded and compressed. The information returned in a JSON document format which amongst others provide you with an URL to download the compressed image
{
   "input":{
      "type":"image\/png",
      "size":132862
   },
   "output":{
      "size":37978,
      "url":"https:\/\/api.tinify.com\/output\/a86rugkyz942wdz4j8249hqcqqr1p3rq",
      "type":"image\/png",
      "width":500,
      "height":889,
      "ratio":0.2858
   }
}
Download compressed imaged
curl https://api.tinify.com/output/a86rugkyz942wdz4j8249hqcqqr1p3rq \
     --user api:YOUR_API_KEY \
     --output optimized.png
To be able make use of these API calls you need an API token, which can acquire by you will have to register your e-mail address and name on this page.
The API provide more options, you can find more information on their API Reference page.
Resulting Shortcut
For now the Shortcut has the following restrictions
- The Shortcut uses the ‘Select Photos’-action
- Only one image can be selected
- Selected image is always converted to PNG
With moving some steps around it can easily be modified to allow for multiple images or even having it be called from the share sheet. But for now it serves my purpose…
At the end of this post a download link is available for this TinyPNG Shortcut, but there are a couple of parts within the Shortcut the require some explanation and could be of use when you want to develop your own Shortcuts the require some sort of authorization and/or JSON output.
Dictionaries and Import Questions
When starting out this Shortcut I used a dictionary to store the API token and path for storing images, but I couldn’t get it to work correctly using the ‘Import Questions’ feature so I reverted to just using two separate variables instead (API_TOKEN and IMG_PATH).
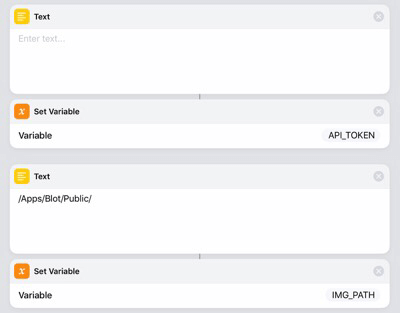 Setting the variables API_TOKEN and IMG_PATH
Authorization for the API call
For the basic authorization the required information (api:<API token>) needs to be encoded using base64.
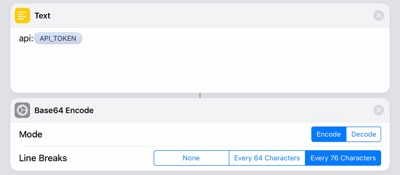 Encoding the API token
Reading JSON returned from the API call
Reading the returned JSON information is done using three Dictionary steps, 1 to create a dictionary from the JSON document followed by two steps to read data from the dictionary. The first reads the value of output and the second reads the value of url.
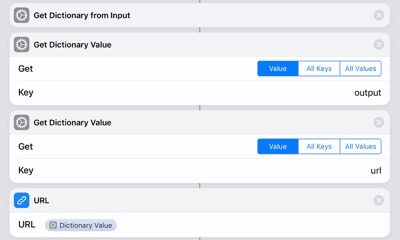 Getting the URL from the JSON document
Download the Shortcut
You can download the TinyPNG Shortcut using this link. When importing the Shortcut you will be asked to provide values for your TinyPNG API token (variable API_TOKEN) and the path for saving the final image (variable IMG_PATH).